You signed the lease, the kitchen has four cabinets and two drawers, and the move-in checklist says no holes, no adhesive, and no changes to the cabinets. Every organizing guide you find opens with "install a pegboard" or "add pull-out drawers," which is fine for homeowners and useless when a deposit worth one or two months' rent depends on the walls staying untouched. The plans renters report actually surviving a lease start from the opposite direction: first what you cannot change, then what you can add without leaving a mark.
This is the step-by-step version of our renter-friendly kitchen storage guide. It is a process rather than a product list: read the lease, map the fixed layout, protect what the landlord owns, then add storage that comes down in one afternoon. If you want the full menu of hardware, our no-drill kitchen storage ideas cover each mount type in depth.
Step 1: Read the Lease and Photograph Everything
Before buying a single bin, find the section of your lease on alterations and damage. Most leases forbid drilling and painting, and many also mention adhesives, contact paper, and "fixtures," which can include anything screwed into a cabinet. A few small nail holes are often treated as normal wear, but that varies by lease and by state, so do not assume yours allows them.
Then take dated photos of every cabinet interior, drawer, shelf, and wall you plan to touch. Note existing scratches, peeling laminate, loose hinges, and any liner or organizer the previous tenant left behind. Renters consistently report that the deposit disputes they lose are the ones where they cannot prove the damage was already there.
If you want to use adhesive hooks or a tension rod against painted drywall, ask in writing. A short email that says "I plan to use removable adhesive hooks and a tension shelf, no drilling" and a reply that says "fine" is worth more than any product on this list.
Step 2: Map the Layout You Cannot Change
The sink, stove, and refrigerator are fixed, and everything else has to be arranged around them. Count your cabinets and drawers, then assign each one to the fixed appliance it sits nearest: cookware and utensils beside the stove, dishes and cleaning supplies beside the sink, food containers and prep tools beside the fridge. In a small rental this usually means one or two cabinets per zone, which works as long as the zones do not overlap.
Measure while you are at it. Upper cabinets are typically about 12 inches deep, base cabinets about 24 inches deep, and the gap between the counter and the upper cabinets is usually around 18 inches, but write down your actual numbers. Nearly every organizer you buy later is sized against those three measurements, and the most common complaint in reviews of cabinet inserts is that they did not fit.
If the kitchen has no drawers at all, or no pantry, the zone map changes. Our guides to a kitchen with no drawers and where to put food when there is no pantry cover how to substitute for each.
Step 3: Line Every Shelf and Drawer Before Anything Goes In
Shelf liner is the cheapest deposit insurance in the kitchen. A roll of non-adhesive ribbed or grip liner, typically 12 to 20 inches wide and 10 to 20 feet long, costs under $15 and covers a small kitchen's cabinets and drawers. It stops pans from scratching the landlord's shelves, catches spills, and peels out in seconds at move-out with nothing to scrub.
Avoid adhesive contact paper inside cabinets. It looks tidy, but renters report that on older laminate it either lifts the finish when removed or leaves a residue that takes an hour of scrubbing per shelf. If you have wire shelving, choose a firm ribbed liner so small jars do not tip through the gaps.
The liner also does double duty under any freestanding organizer you add later. Risers and pull-out bins can leave wear marks on bare wood after a year of sliding; a liner underneath means the shelf looks the way it did on move-in day.
Step 4: Double the Cabinet Space With Inserts, Not Screws
Freestanding inserts add the second level that most rental cabinets are missing. A shelf riser 5 to 8 inches tall turns one shelf into two for plates and bowls, and a two-pack usually runs under $25. In the corner cabinet, a lazy susan of 9 to 12 inches for uppers, or 16 inches and up for a base corner, replaces the dark back third you can never reach.
These work when the cabinet shelf is flat, at least 10 inches deep, and has 12 or more inches of clearance above it. They do not work when the cabinet has a fixed center divider, a narrow face-frame lip that blocks a pull-out bin, or a shelf so thin it bows under a stack of plates. Check the listing for current dimensions against the numbers from Step 2, and skip anything that ships with mounting screws.
Our roundup of the best lazy susans for cabinets and corners compares diameters and weight ratings, and risers get their own comparison at the end of this guide.
Step 5: Add Storage That Comes Down in Five Minutes
Everything you hang or mount should pass one test: can it come down at move-out without a trace? Tension rod shelves between the counter and upper cabinets, over-the-cabinet-door racks, and magnetic strips on the side of the fridge all pass. Anything with a screw, a nail, or a permanent adhesive pad fails.
The details matter for the deposit. Tension rods can leave a pressure ring on painted drywall if they are cranked tight and left for a year; a rubber or felt cap on each end spreads the load and costs under $5. Over-the-door racks fit standard cabinet doors around 3/4 inch thick but can scratch the finish where the hooks rest, so a strip of felt tape under each hook is worth the two minutes.
Heavy-duty adhesive strips are the gray area. They come off cleanly from most painted walls when the tab is pulled straight down, but renters consistently report peeled paint on textured walls, on paint less than a month old, and on matte finishes. Test one strip in a hidden spot for a week before trusting a rack full of spice jars to it.
Step 6: Bring in Freestanding Furniture as the Pantry You Don't Have
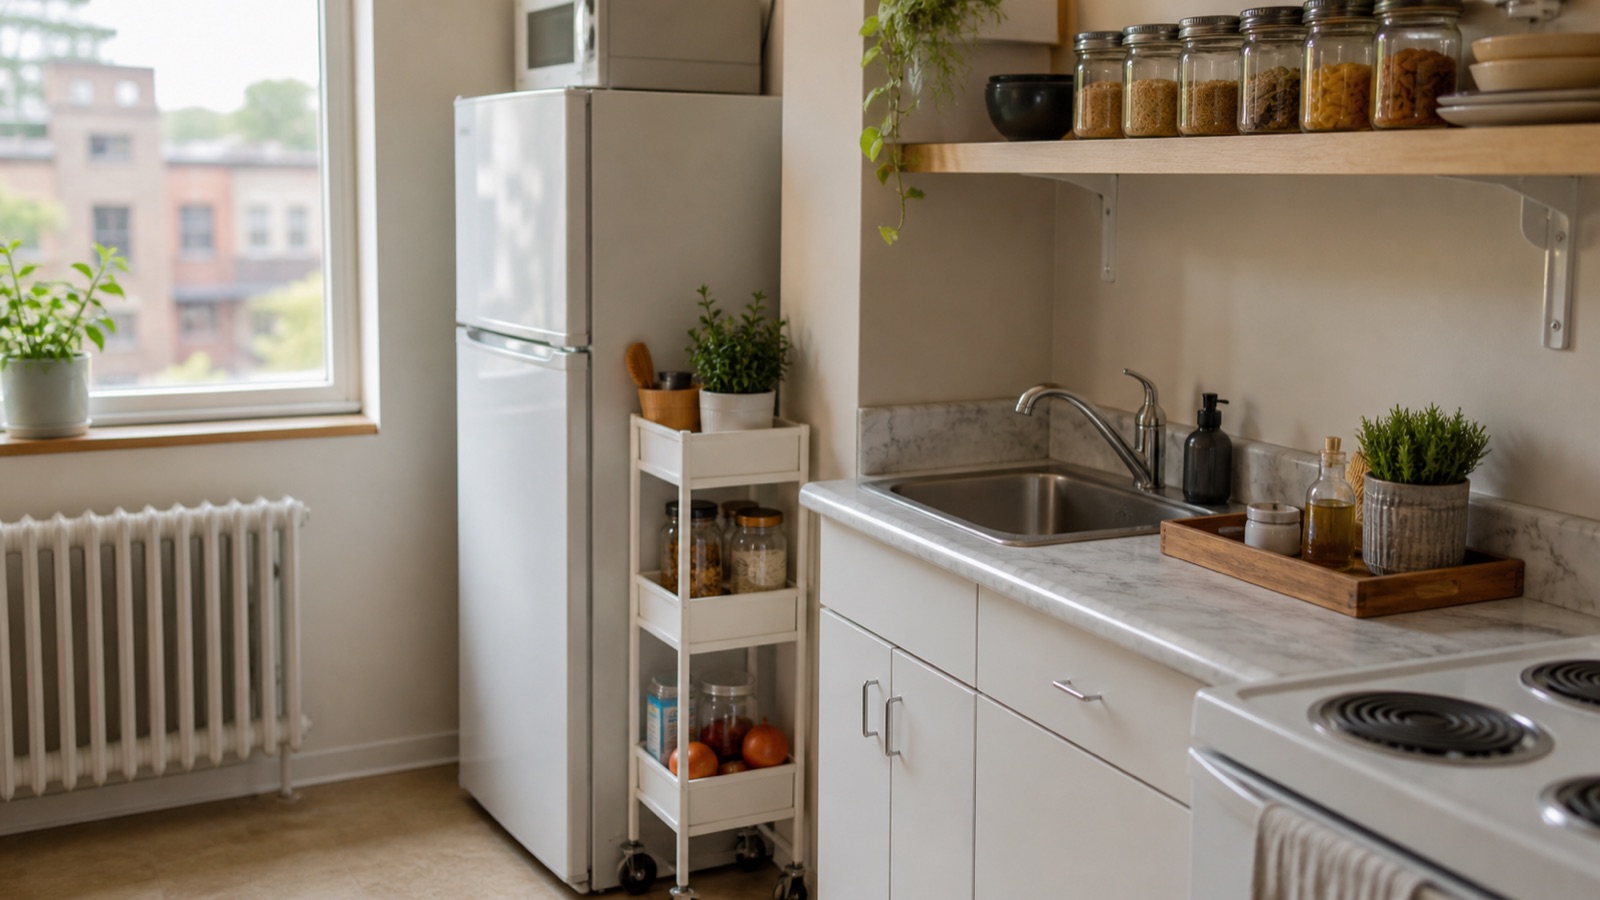
When cabinets run out, the deposit-safe answer is furniture that rests on the floor and leaves with you. A three-tier rolling cart 13 to 18 inches wide fits beside the fridge or at the end of the counter and holds oils, dry goods, and small appliances. A slim cart 5 to 10 inches wide slides into the gap between the fridge and the wall and takes cans and spice jars.
For a real pantry substitute, a freestanding shelving unit 24 to 36 inches wide and about 12 inches deep along a bare wall holds more than most rental cabinets combined. The catch is anchoring. Tall units are designed to be screwed to the wall for tip-over safety, so in a rental either keep the unit under about 48 inches tall with the heavy items on the bottom, or get written permission for the one anchor screw.
Renters consistently report that the cart is the first thing they buy and the one they take to the next apartment. See our picks for the best rolling carts for small kitchens for the models that survive several moves.
Step 7: Fix Under the Sink Without Touching the Plumbing
The under-sink cabinet in a rental is usually the worst-organized space in the apartment: a drain trap in the middle, a garbage disposal on one side, and cleaning bottles loose on the floor. Expandable under-sink shelves with removable slats are made to be assembled around the pipes, and a pair of stackable drawers fills the side the plumbing does not use. Neither needs a screw into the cabinet floor.
Measure the height from the cabinet floor to the bottom of the sink basin, typically 14 to 20 inches, and the clearance on either side of the trap. A disposal unit takes 8 to 10 inches on its side, and that side often only has room for a single shallow bin. Add a rubber mat or plastic tray on the cabinet floor, because the deduction that catches renters off guard is a swollen, water-stained cabinet floor, not a scratch.
Our roundup of the best under-sink organizers compares shelves that adjust around a disposal against ones that only clear a plain trap.
Step 8: Plan the Reversal Before Move-Out Day
Everything above is chosen so that move-out takes about 30 minutes. Pull the liners and wipe the shelves, lift out the risers and bins, and back the tension rods off slowly so the caps release without pulling paint. Adhesive strips come off with the tab pulled straight down along the wall; if one resists, warm it with a hair dryer for about 20 seconds and slide dental floss behind it.
Put back anything the landlord left in the kitchen, including the drawer inserts and shelf pins you removed in month one. Then take the same set of photos you took at move-in, from the same angles, and keep both sets until the deposit is returned.
Two purchases carry most of this plan: a cart that becomes the pantry, and a set of risers that doubles the cabinets. If you are furnishing the kitchen from scratch, start with the rolling cart picks above and our comparison of the best shelf risers and cabinet shelves, then let the crowded cabinets tell you what else is worth buying.