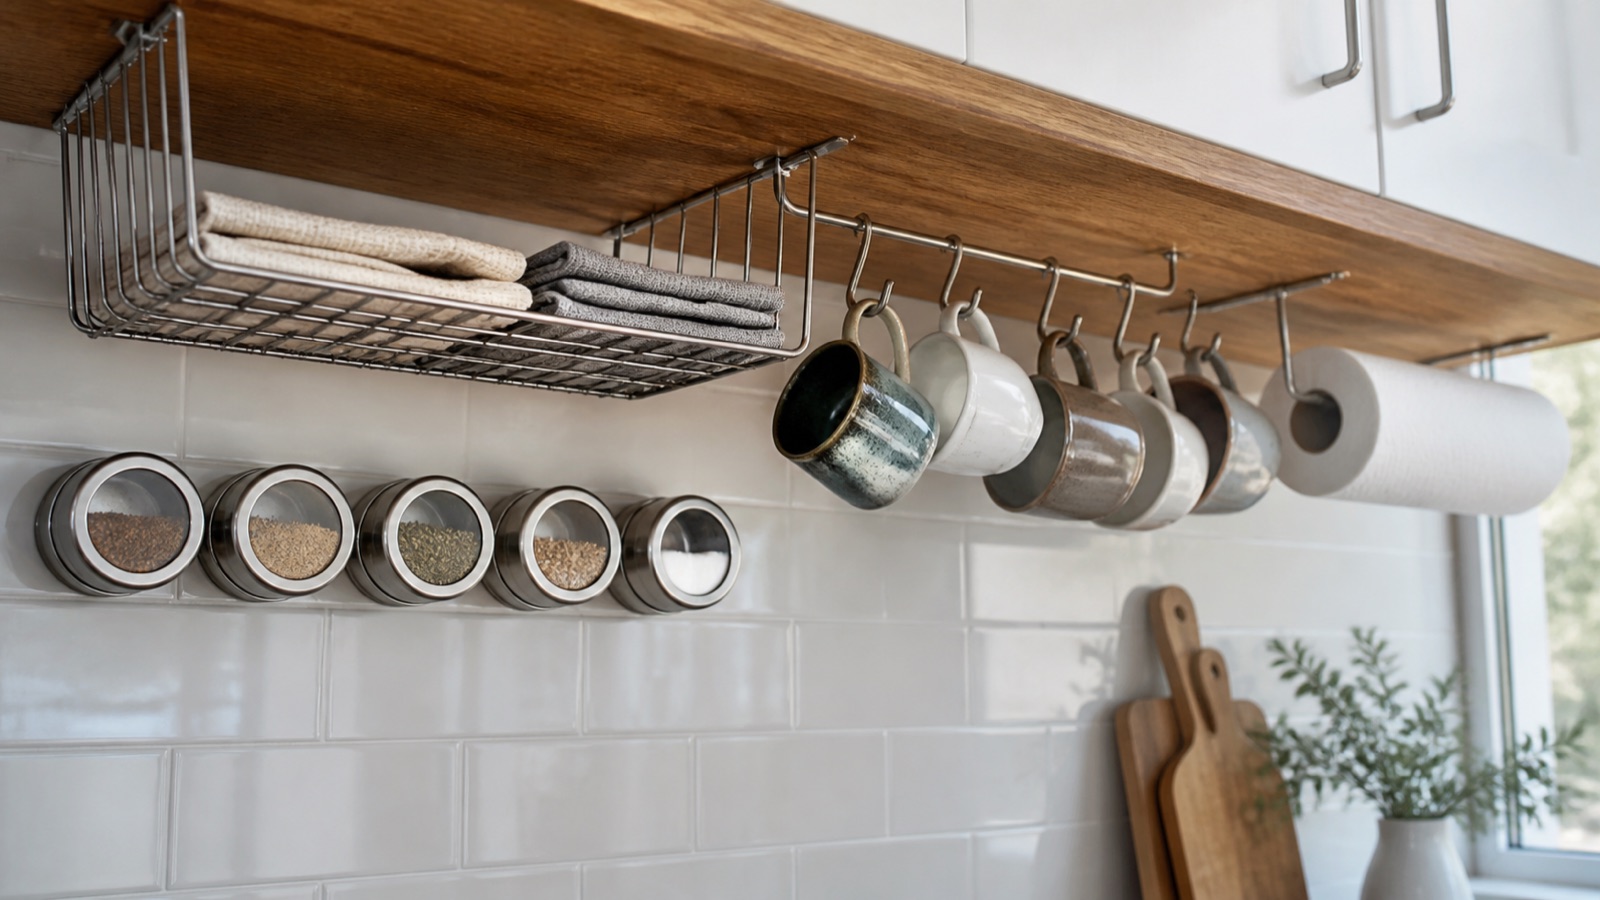
The 15–18 inches between your counter and the upper cabinets is the busiest space in a small kitchen, and the underside of those cabinets is the one surface in it that nobody uses. If you are looking for under cabinet storage ideas, you are probably trying to get mugs, a paper towel roll, spice jars, or a knife block off a counter that is barely two feet wide. The problem with most of the hooks and racks you will find is that the product photos never show what is actually under your cabinet, whether that is a face-frame lip, a half-inch particleboard bottom, or a strip of LED lights, and each of those changes what will hold.
This guide is part of our small kitchen storage ideas by zone series, and it starts with the cabinet rather than the product. Once you know what the underside is made of and whether it has a lip, the choice between screws, adhesive, and a countertop riser mostly makes itself. Each option below comes with what it holds, when it works, and when it falls off.
Look at the underside before you buy anything
Open a lower door, crouch, and look up at the bottom of the upper cabinet. Face-frame cabinets have a wooden frame that extends 1–2 inches below the bottom panel, creating a recessed pocket; frameless (European-style) cabinets have a flat bottom flush with the door. Note the material too: a bottom panel is usually half-inch to three-quarter-inch plywood or particleboard, sometimes with a decorative light rail molding along the front and under-cabinet lights or their wiring running along it.
- AClear height from counter to cabinet bottom — whatever you hang eats into it, so check what still has to fit below
- BWidth of the run you can mount into, measured inside the face-frame lip if there is one
- CDepth from the front edge back — a drawer has to clear the light rail and any wiring
That inspection decides your mounting method. Screws hold well in plywood, but particleboard needs a pilot hole and a screw shorter than the panel is thick, or the tip comes through the cabinet floor above. Adhesive mounts need a smooth, finished surface wiped with rubbing alcohol and left to cure for 24 hours; a raw, unfinished plywood underside is the single most common reason reviews say "fell off in a week." If you rent, start with the adhesive and countertop options here and see our guide to no-drill kitchen storage for the deposit-safe version of everything else.
Cup hooks for mugs
Screw-in cup hooks are the cheapest under-cabinet upgrade there is: a pack of 20 brass or vinyl-coated hooks about an inch long typically costs under $10, and each one holds a single mug. Space them 4–5 inches apart in a row along the front edge, inside the lip if you have one, and drill a pilot hole first so the wood does not split. A row of six hooks clears half a shelf of mugs and puts them where you can grab one with the coffee maker underneath.
Hooks work best in solid or plywood bottoms at least half an inch thick, with mugs in the 10–16 ounce range. They struggle in thin particleboard, where reviews report hooks loosening after a few months of pulling mugs off at an angle. Adhesive hooks rated for 1–2 pounds work for lighter mugs on a smooth finished underside, but they need the full cure time before loading. Keep mug hooks away from the range, since mugs hanging over a stove collect grease, and see our guide to mug storage when cabinet space is gone for rail racks and trees when hooks are not enough.
Paper towel and wrap holders
A paper towel roll is about 11 inches long and 5–6 inches across, so an under-cabinet holder needs roughly 7 inches of vertical clearance below the mounting point and 12 inches of width, which is why the space next to the sink is usually the spot. Screw-mounted holders take two to four short screws and handle one-handed tearing; adhesive versions are easier to install but the most common complaint in reviews is the whole holder coming down the first time someone yanks a sheet with one hand. If you want adhesive, buy a model with a tension arm or ratcheting bar that lets a sheet tear without a hard pull.
The same mounts exist for foil and plastic wrap boxes, and a combined rack keeps all three off a drawer. The main limit is headroom: on a face-frame cabinet the holder hangs below the lip, so check that a tall coffee maker or blender parked below it still fits, and check the listing for current dimensions before you commit to a spot.
Under-cabinet drawers and baskets
A screw-mounted under-cabinet drawer, 2–3 inches tall and 10–12 inches wide, gives you a shallow slide-out for spices, tea bags, foil boxes, or the phone chargers that otherwise live on the counter. Most sit in the $20–40 range and mount with four screws into the bottom panel. Because they sit at eye level, they also stay organized; anything that does not fit in a 2-inch-tall drawer is not going in.
These work on frameless cabinets, or on face-frame cabinets when the drawer is narrow enough to slide out within the lip. If the drawer is wider than the opening between lip and back wall, it will not open, which is the mounting mistake people report most often. Weight ratings are usually under 10 pounds, and adhesive-mounted mini versions hold closer to 1–2 pounds, enough for a few spice tins and not much else. For spice jars specifically, our guide to spice storage in a small kitchen compares under-cabinet drawers with door racks and drawer inserts.
Stemware racks
An under-cabinet stemware rack with three rails holds roughly 9–12 wine glasses by the base and clears a full shelf. It needs screws, a bottom panel that can take them, and about 8–9 inches of clearance below for the glasses to hang without hitting whatever sits on the counter. Mount it at the end of the counter farthest from the stove and the cutting board, because glasses hanging in a prep zone get bumped and glasses near a range get greasy.
Magnetic strips: knives on the backsplash, spice tins under the lip
A magnetic knife strip belongs on the wall under the cabinet, not on the underside of the cabinet itself; knives hanging blade-down over your hands are a bad idea, and reviews from people who tried it say the same. Mounted on the backsplash 2–3 inches below the cabinet, a 12–16 inch strip holds six to eight knives in the exact space a knife block would have wasted on the counter. Our roundup of the best magnetic knife strips and racks compares screw-mount and adhesive models, including options rated for tile.
The underside of the cabinet lip is a good spot for a shorter strip holding magnetic spice tins, which weigh only a few ounces each and stick without any risk. The limit is the wall itself: tile needs either an adhesive strip rated for tile or screws driven into the grout lines, and drywall needs anchors for a knife strip loaded with heavy blades.
The counter side of the gap: risers under the cabinet
If you cannot attach anything to the cabinet, use the gap from the counter up. A two-tier shelf riser 4–6 inches tall sits on the counter directly under the cabinet and holds spices, oils, and small jars on two levels while leaving 10–12 inches of clearance above it for everyday reaching. Expandable risers stretch from about 12 to 20 inches wide to fit whatever run of counter you have; our roundup of the best shelf risers and cabinet shelves covers the sizes that work under standard uppers.
The limits are light and heat. A riser under the cabinet sits in the cabinet's shadow, so if you rely on under-cabinet lighting, keep it low or place it away from the light. Do not put a riser next to the range, where oil bottles on the upper tier warm up every time you cook. For the bigger picture on what belongs on the counter at all, see our guide to freeing up counter space in a tiny kitchen.
Where to start
Identify the underside first, then pick by permission and weight. Renters and anyone with particleboard cabinets should start with adhesive mug hooks, a tray on a riser, and a knife strip on the wall. Owners with plywood bottoms can add screw-in hooks, a paper towel holder, and a 2-inch drawer in an afternoon for well under $60 in parts. Whatever you mount, check the listing for current dimensions against your lip depth and the clearance to the counter before you drill.